
The first style of Silk Screening that I will be blogging about is the Speedball drawing fluid and Screen fluid method.
Lets start with the tools used:
* Silk Screen (These days they aren't made of silk but this is what they are usually advertised as) Mine was 10 X 12 and a good size to make a regular sized tshirt print on. I only used about half of it so that I can use the second half to demo mask ease in my demo.
* Squeegee to push ink through screen onto design.
* Speedball Fabric Ink, black.
* 4 OPUS Capella Round brush. I found that this brush was the perfect size for more detailed lines without being too small to fill in the larger areas. At only a couple of bucks the price was right too!
* Masking Tape to cover the edges of the screen. This makes clean up quite a bit easier and helps to keep ink out of unwanted areas.
* Newspaper to keep your work area clean. Maybe it's just how i do things but I found this to be a messy process.
* A sturdy peice of cardboard or an old library card or something of this sort to scrape off the remaining ink as you go along. I think in the long run this will save you a bunch of ink.
* A tshirt! I hit up zellers and got your run of the mill, pink cotton tshirt because I couldn't find a pack of fruit of the loom ones. I think it's probably best to go with cotton. Wash it before printing on it.
I think that's about it :) Now on to the actual Process!
Since this can be a messy project it's always good to have some newspapers down underneath the screen and some paper towels at hand.
I started with a simple design that I had used before. I went into photoshop and sized it appropriately, setting it to black and white and making it lighter to save printer ink. I think by now you have probably come to realize that I am a penny pincher when it comes to art supplies. It's probably my Scottish background :)
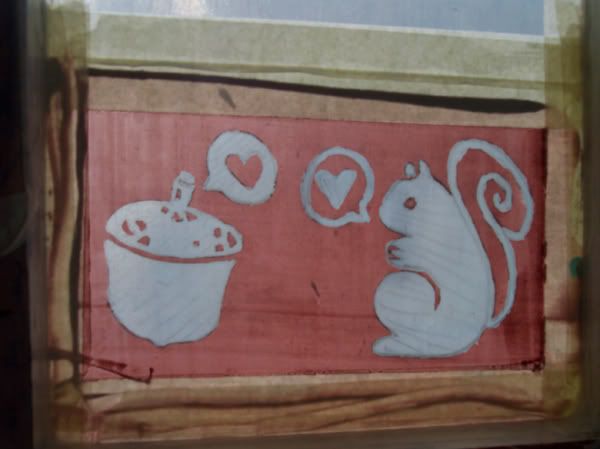
Anyway once you have your design, trace it onto the flat side of your screen with a soft lead pencil. I used a 6B. Make sure that you have it the right way so that you don't end up printing your design backwards. I think it helps to tape the design that you are tracing to the screen so that it doesn't move around.
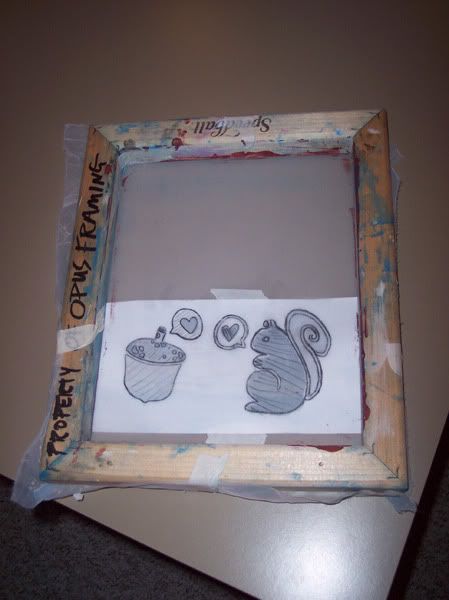
While tracing my design I kept in mind that since my brush wasn't super fine pointed. For example I made a the line of the tail thicker to achieve a nicer effect. Also I tried to put lines through the areas that I wanted completely covered in drawing fluid.
Basically the part of the design that you want to be printed onto your tshirt, you want to cover in drawing fluid.
Once finished tracing the design take away the drawing that you traced from and cover the area underneath the screen with newspaper. It is also a good idea to apply masking tape to the insides of the screen well (as seen one of the later pictures) as well as the areas that you won't be printing. This saves screen filler and makes for an easier clean up.
We are now ready to apply the drawing fluid! Make sure that the Drawing fluid is well mixed before applying. When you have done this you are ready to apply the drawing fluid to your screen.
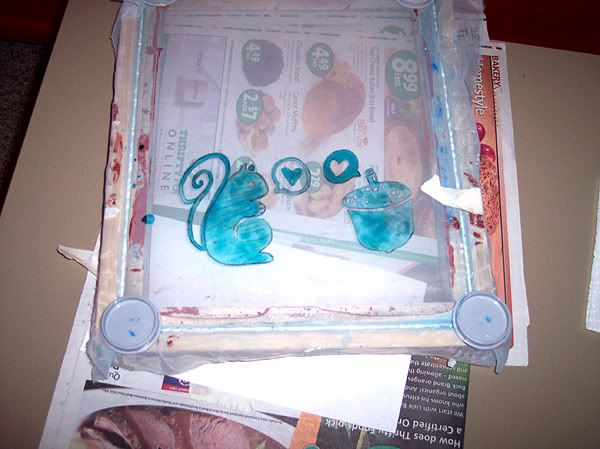
I used a small round brush to apply drawing fluid to the areas that I wanted to be printed. For example, I want the whole of the squirrels body to be a solid part of the design and so i covered it in drawing fluid. You're pretty much just painting the design that you want printed on your tshirt with drawing fluid like is pictured above. Here is a clearer picture:
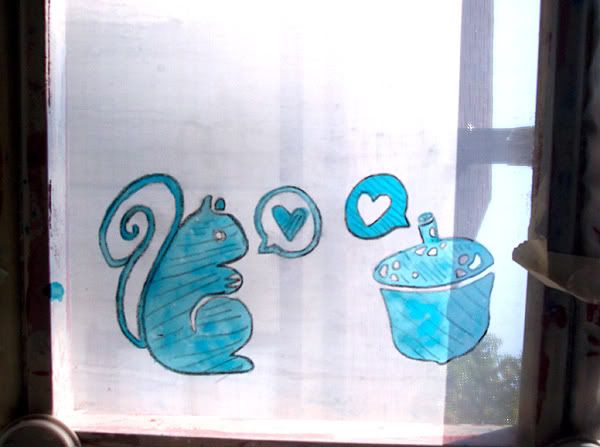
After you have painted on the drawing fluid, it's a good idea to hold it up against a light to see if you have missed any spots or if any bubbles have formed. Take this opportunity to touch up those areas with more drawing fluid.
Wait for the drawing fluid to dry before moving on to the screen filler. I say mine might have taken roughly 30 minutes to dry although it was a very hot day and I also used a regular house fan to speed up the process.
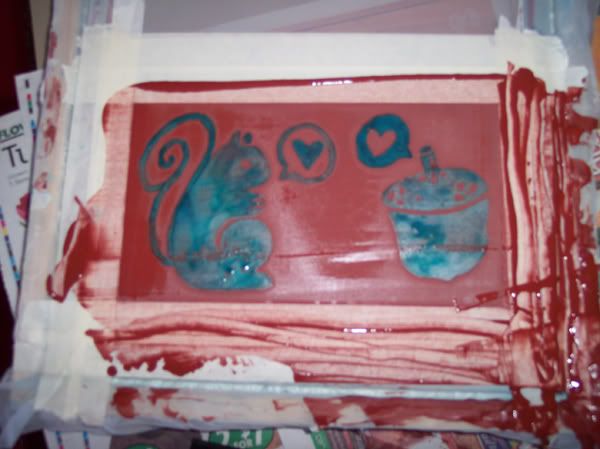
It's time to break out the squeegee. Pour a thick line of screen filler on the side of your screen next to your image. With the squeegee at about a 45 degree angle, pull it across the screen spreading a thin layer of screen flller across the screen and covering your image. Only swipe once so that the drawing fluid isn't washed out.
After the filler has dried, take the screen to a sink and wash away the drawing fluid with cold water.

Use a scrub brush (I bought a nail brush at the dollar store and did the trick!) to get any stubborn drawing fluid out. After you have done this to your satisfaction leave the screen to dry. Once again i used a house fan at it's highest level and it was dry quite quickly.
Your screen is now prepared for printing!
With silk screening you can print on many different kinds of papers and of course on fabric. In a future entry I will show the process of silk screening a tshirt. For now though I will leave you with a picture of the tshirt that I silk screened using the drawing fluid and screen filler method.
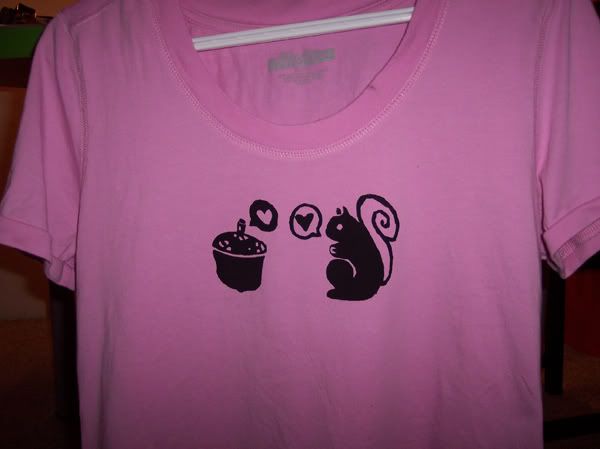
Hope you like it!
I wouldn't have been successful without the valuable tutorials and information on the following websites: